웹사이트의 데이터들은 데이터베이스 에 저장된다.
데이터베이스에 저장된 데이터를 가져와서 사용자에게 보여주기도 하고, 사용자가 입력한 데이터를 데이터베이스에 저장하기도 한다.
우리가 만들 Blog 에 사용할 데이터베이스를 설정해보자.
데이터베이스 셋팅을 진행하기 전에 잠깐 runserver 를 실행해서 뜨는 메세지를 확인해보자.
./manage.py runserver
Performing system checks...

System check identified no issues (0 silenced).

You have 13 unapplied migration(s). Your project may not work properly until you apply the migrations for app(s): admin, auth, contenttypes, sessions.
Run 'python manage.py migrate' to apply them.

September 30, 2017 - 09:45:46
Django version 1.11.5, using settings 'config.settings'
Starting development server at http://127.0.0.1:8000/
Quit the server with CONTROL-C.
이 중 이전 포스트에서 무시하고 넘어갔던 빨간색으로 쓰인 세 번째 문단의 내용을 해석해보자.
You have 13 unapplied migration(s). Your project may not work properly until you apply the migrations for app(s): admin, auth, contenttypes, sessions. Run ‘python manage.py migrate’ to apply them.
13개의 적용 안된
migration이 있으며,admin,auth,contenttypes,sessions앱에migration을 적용하지 않으면 프로젝트가 제대로 작동하지 않을 수 있습니다.
admin, auth, contenttypes, sessions 앱이 잘 작동하지 않을 수 있다는 경고메세지였다. 뭔지는 모르겠지만 잘 작동하지 않을 수 있다니 걱정이다.
여기서 이 migration 은 무엇일까?
Migrations
Migrations 는 Django의 모델 에서 설정한 데이터베이스의 테이블 구조를 데이터베이스에 적용시키기 위한 기록으로 볼 수 있다.
Migrations
Migrations are Django’s way of propagating changes you make to your models (adding a field, deleting a model, etc.) into your database schema. They’re designed to be mostly automatic, but you’ll need to know when to make migrations, when to run them, and the common problems you might run into.
출처: Django 공식 문서
admin, auth, contenttypes, sessions 등과 같은 앱들은 데이터를 저장할 공간이 필요한 작업을 수행하는 앱들이며, 따라서 데이터베이스에 데이터들이 저장될 테이블이 미리 만들어져있어야 제대로 작동한다.
위의 경고 메세지는 앱들이 필요로하는 데이터베이스 구조가 데이터베이스에 구성되어 있지 않기 때문에 나타난 것이다.
앱들이 필요로하는 데이터베이스 구조를 기록한 것이 Migrations 파일이고, 이를 데이터베이스에 적용시키는 것을 migrate 한다고 한다.
위의 메세지에 의하면 앱들에 의해 이미 13개의 Migrations 파일이 생성되어 있지만 실제 데이터베이스에 migrate 되지 않았다고 한다.
그럼 지금부터 앱들이 저장공간으로 사용할 수 있도록 데이터베이스를 셋팅해보자.
SQLite
데이터베이스에는 다양한 종류가 있다. Django 는 데이터베이스의 하나인 SQLite 를 포함하고 있다.
SQLite
SQLite는 MySQL나 PostgreSQL와 같은 데이터베이스 관리 시스템이지만, 서버가 아니라 응용 프로그램에 넣어 사용하는 비교적 가벼운 데이터베이스이다. 영어권에서는 ‘에스큐엘라이트(ˌɛskjuːɛlˈlaɪt)’또는 ‘시퀄라이트(ˈsiːkwəl.laɪt)’라고 읽는다.
출처: 위키백과
SQLite 는 하나의 파일에 데이터를 저장하여 쉽고 간편하게 사용할 수 있다는 점이 특징이다.
settings.py 에서 프로젝트에 사용할 데이터베이스를 지정해줄 수 있으며, 기본적으로 SQLite3 을 사용하도록 설정되어 있다.
# settings.py line 76

DATABASES = {
    'default': {
        'ENGINE': 'django.db.backends.sqlite3',
        'NAME': os.path.join(BASE_DIR, 'db.sqlite3'),
    }
}
SQLite 는 데이터베이스를 db.sqlite3 라는 파일에 모두 저장한다.
Migrate 하기
이제 데이터베이스에 대해서도 알아봤으니, 앱들을 위한 데이터베이스 테이블을 만들어주도록 하자.
콘솔에서 manage.py 가 있는 폴더까지 이동한 후, 아래의 명령어를 입력한다.
python manage.py migrate
migrate 명령어는 settings.py 의 INSTALLED_APPS 리스트를 확인하여 리스트에 포함된 앱이 필요로하는 테이블을 데이터베이스에 생성한다.
Operations to perform:
  Apply all migrations: admin, auth, contenttypes, sessions
Running migrations:
  Applying contenttypes.0001_initial... OK
  Applying auth.0001_initial... OK
  Applying admin.0001_initial... OK
  Applying admin.0002_logentry_remove_auto_add... OK
  Applying contenttypes.0002_remove_content_type_name... OK
  Applying auth.0002_alter_permission_name_max_length... OK
  Applying auth.0003_alter_user_email_max_length... OK
  Applying auth.0004_alter_user_username_opts... OK
  Applying auth.0005_alter_user_last_login_null... OK
  Applying auth.0006_require_contenttypes_0002... OK
  Applying auth.0007_alter_validators_add_error_messages... OK
  Applying auth.0008_alter_user_username_max_length... OK
  Applying sessions.0001_initial... OK
위와 같이 무언가가 잔뜩 생성되는 것을 볼 수 있다. 대충 살펴보면 아까 언급되었던 앱들에 대한 테이블들인 것을 알 수 있다.
이렇게 migrate 하고 나면 프로젝트 폴더에 db.sqlite3 라는 파일이 생긴 것을 볼 수 있다.
myproject
├── blog
│   ├── admin.py
│   ├── apps.py
│   ├── __init__.py
│   ├── migrations
│   │   └── __init__.py
│   ├── models.py
│   ├── tests.py
│   └── views.py
├── config
│   ├── __init__.py
│   ├── settings.py
│   ├── urls.py
│   └── wsgi.py
├── db.sqlite3  # 데이터베이스 파일이 생겼다.
└── manage.py
이렇게 테이블들을 생성해준 뒤 다시 runserver를 실행시켜보면 빨간색 경고메세지가 뜨지 않는다.
SQLite Browser
SQLite 데이터베이스를 좀 더 직관적으로 관리할 수 있도록 해주는 GUI 프로그램이 있다.
SQLite Browser 이라는 프로그램이며, 아래 링크에서 다운받아 설치할 수 있다.
SQLiteBrowser
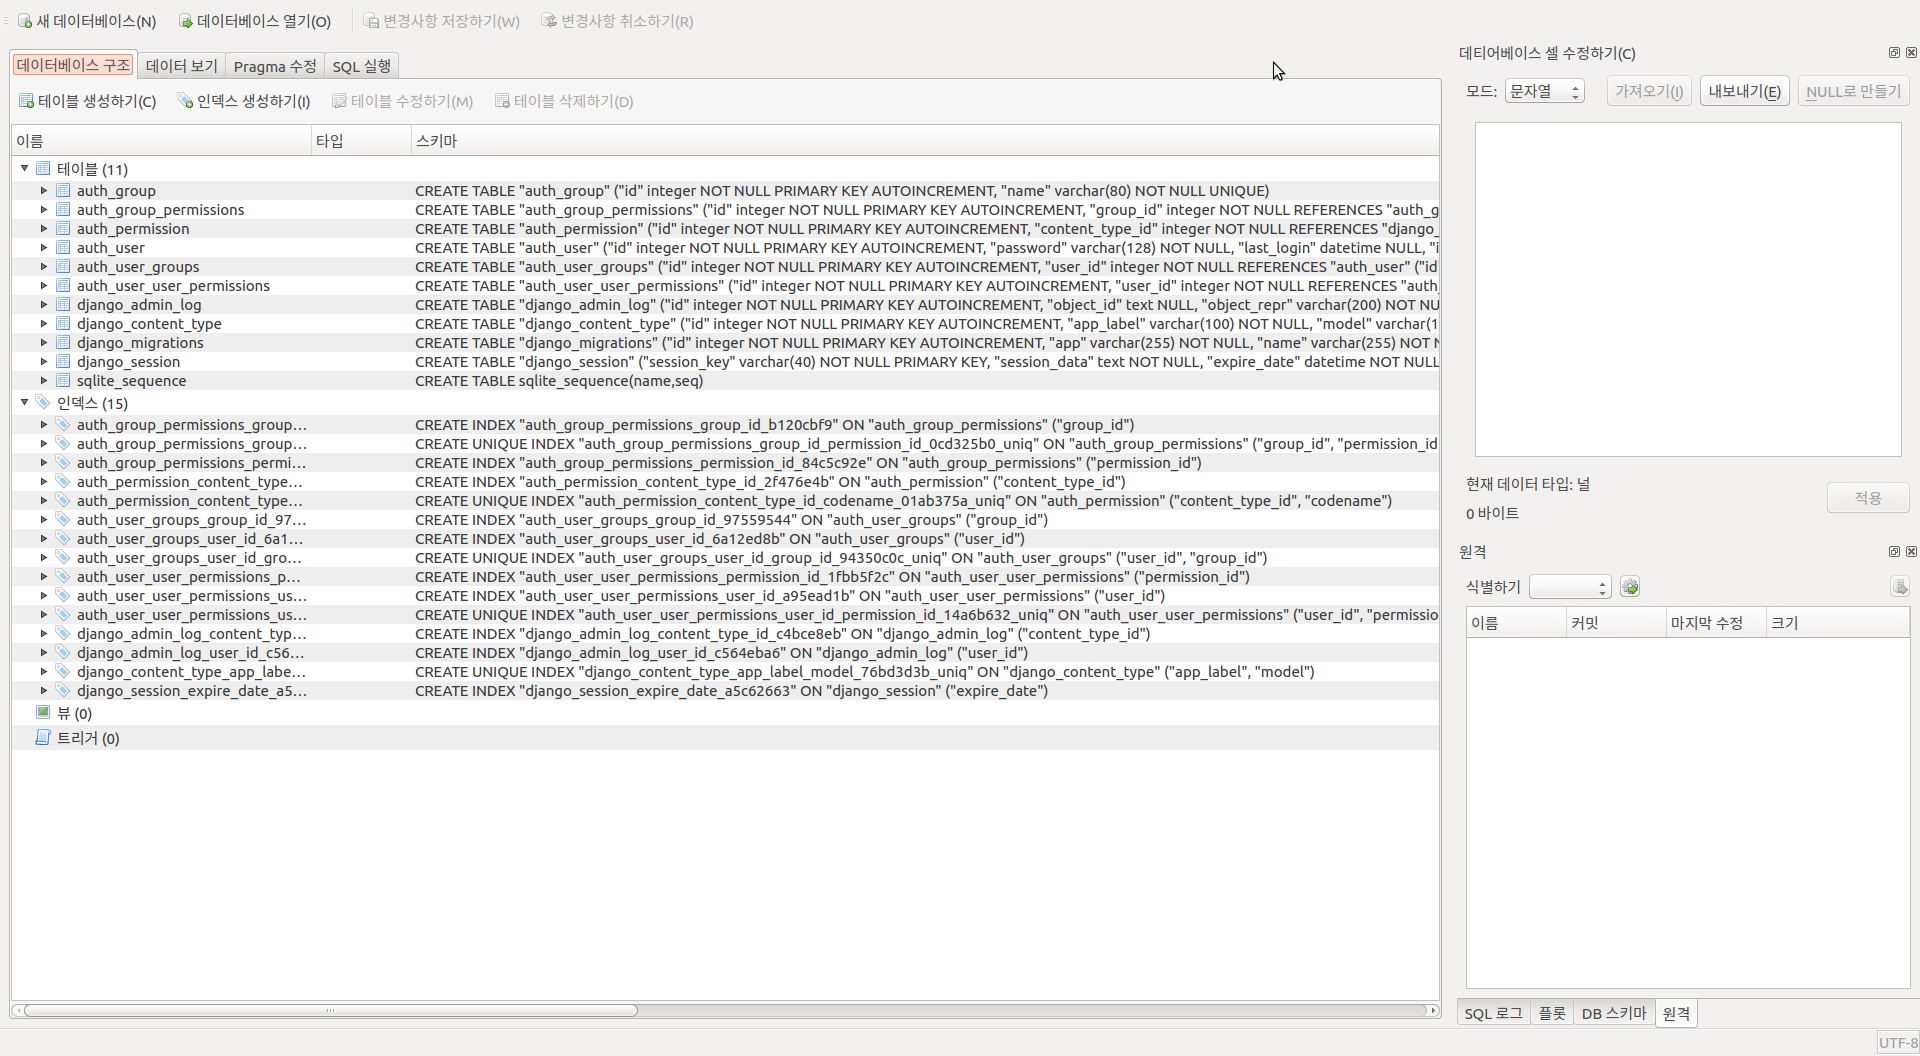
이 프로그램을 통해서 우리가 생성한 테이블을 직접 확인해볼 수 있다.
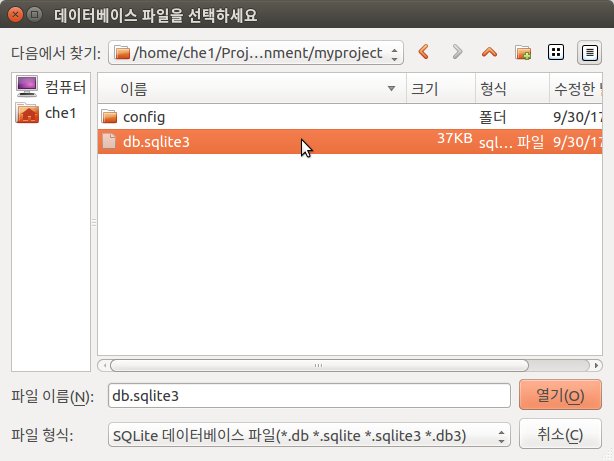
SQLite Browser 를 실행한 뒤 데이터베이스 열기(O) 를 클릭하면 아래의 창이 나타난다.

myproject 폴더의 db.sqlite3 파일을 연다.

테이블들이 생성되어 있는 것을 확인할 수 있다.
Migration 만들기
데이터베이스에 변화가 생길 때에는 항상 어떤 변화가 생기는지에 대한 기록을 남겨야한다.
아래 명령을 입력하면 앱 폴더 안의 migrations 폴더에 데이터베이스 변경사항에 대한 정보가 기록된다.
./manage.py makemigrations 앱이름
앞서 기본적으로 적용되어 있던 앱들에 대해 migrate 했을 때에는 이미 13개의 migration 이 생성되어 있었기 때문에 따로 만들어줄 필요가 없었다.
이제 우리가 직접 만들었던 blog 앱의 Post 모델에 대한 migration 을 만들어 데이터베이스에 적용해보자.
아래 명령을 실행한다.
./manage.py makemigrations blog
Migrations for 'blog':
  blog/migrations/0001_initial.py
    - Create model Post
blog 앱 폴더에 migrations 폴더가 생겼고, 그 안에 0001_initial.py 라는 파일이 생성되었다.
blog
├── admin.py
├── apps.py
├── __init__.py
├── migrations
│   ├── 0001_initial.py  # `migration` 파일이 생성되었다.
│   └── __init__.py
├── models.py
├── tests.py
└── views.py
Python 파일이므로 직접 열어서 내용을 확인해볼 수도 있다.
class Migration(migrations.Migration):

    initial = True

    dependencies = [
        migrations.swappable_dependency(settings.AUTH_USER_MODEL),
    ]

    operations = [
        migrations.CreateModel(
            name='Post',
            fields=[
                ('id', models.AutoField(auto_created=True, primary_key=True, serialize=False, verbose_name='ID')),
                ('title', models.CharField(max_length=100)),
                ('content', models.TextField(blank=True)),
                ('created_date', models.DateTimeField(auto_now_add=True)),
                ('published_date', models.DateTimeField(blank=True, null=True)),
                ('author', models.ForeignKey(on_delete=django.db.models.deletion.CASCADE, to=settings.AUTH_USER_MODEL)),
            ],
        ),
    ]
우리가 Post 모델에 입력했던 사항들이 담겨있는 것을 볼 수 있다. 새로운 사항이라면 id 라는 필드가 자동으로 생성되어 있다.
이제 migration 파일을 만들었으니 이 내용들을 데이터베이스에 migrate 시키는 일만 남았다.
migrate 하지 않고 runserver 를 실행시켜보면 처음 runserver 를 했을 때 받았던 경고 메세지와 동일한 메세지를 받을 수 있다.
./manage.py runserver
Performing system checks...

System check identified no issues (0 silenced).

You have 1 unapplied migration(s). Your project may not work properly until you apply the migrations forapp(s): blog.
Run 'python manage.py migrate' to apply them.

October 02, 2017 - 16:03:29
Django version 1.11.5, using settings 'config.settings'
Starting development server at http://127.0.0.1:8000/
Quit the server with CONTROL-C.
이번에는 1개의 적용되지 않은 migration 이 있고, 이 때문에 blog 라는 앱이 정상적으로 작동하지 않을 수 있다는 내용이다. 이제서야 이 메세지가 의미하는 바를 제대로 알게 되었다.
그럼 이제 migrate 를 실행하여 데이터베이스에 Post 모델이 사용할 테이블을 만들어주자.
./manage.py migrate blog
Operations to perform:
  Apply all migrations: admin, auth, blog, contenttypes, sessions
Running migrations:
  Applying blog.0001_initial... OK
위와 같이 blog.0001_initial 을 적용한다는 메세지가 뜨면서 데이터베이스가 변경된다.
SQLite Browser 를 통해 확인해보자.

오오… 우리가 작성했던 Post 모델 클래스의 속성들이 필드로 들어가있는 것을 확인할 수 있다.
※ 데이터베이스 스키마 확인하기
데이터베이스는 SQL 을 통해 관리된다. migrate 명령어는 Python으로 작성된 데이터베이스 변경사항을 SQL 로 번역해주는 역할을 한다고 할 수 있다.
아래의 명령어를 입력하면 migration 이 migrate 될 때 실제로 실행되는 SQL 명령어를 확인할 수 있다.
./manage.py sqlmigrate 앱이름 migration번호
blog 앱의 Post 모델의 0001.initial 을 확인해보자.
./manage.py sqlmigrate blog 0001
BEGIN;
--
-- Create model Post
--
CREATE TABLE "blog_post" ("id" integer NOT NULL PRIMARY KEY AUTOINCREMENT, "title" varchar(100) NOT NULL, "content" text NOT NULL, "created_date" datetime NOT NULL, "published_date" datetime NULL, "author_id" integer NOT NULL REFERENCES "auth_user" ("id"));
CREATE INDEX "blog_post_author_id_dd7a8485" ON "blog_post" ("author_id");
COMMIT;
우리가 만든 모델이 가지는 구조의 테이블을 데이터베이스에 기록하는 SQL 명령어들을 확인할 수 있다. 이렇게 데이터베이스의 자료 구조, 자료간 관계 등을 정의해놓은 것을 데이터베이스 스키마라고 한다.
데이터베이스 스키마 (Database Schema)
데이터베이스 스키마(database schema)는 데이터베이스에서 자료의 구조, 자료의 표현 방법, 자료 간의 관계를 형식 언어로 정의한 구조이다. 데이터베이스 관리 시스템(DBMS)이 주어진 설정에 따라 데이터베이스 스키마를 생성하며, 데이터베이스 사용자가 자료를 저장, 조회, 삭제, 변경할 때 DBMS는 자신이 생성한 데이터베이스 스키마를 참조하여 명령을 수행한다.
출처: 위키피디아
이 명령어는 실제 데이터베이스 변경을 실행하지는 않고 실행될 스키마를 열람만 한다.
Reference
이한영 강사님 강의자료
School of Web: http://schoolofweb.net/blog/posts/%EB%82%98%EC%9D%98-%EC%B2%AB-django-%EC%95%B1-%EB%A7%8C%EB%93%A4%EA%B8%B0-part-2-1/
Djangogirls: https://tutorial.djangogirls.org/ko/